With ChatGPT now available in the Azure OpenAI Service, developers have the opportunity to seamlessly integrate cutting-edge models such as GPT-4, GPT-3, Codex, and DALL-E into their app development process. This means that organizations can now train models with private data without worrying about it being stored or retained in the LLM (Large Language Model), while also giving developers control over model and the ability to innovate. By leveraging on Microsoft Azure’s robust security capabilities, Azure OpenAI provides native support for private networking, ensuring secure and encrypted communication between applications and AI models as well as responsible AI usage. In today’s post, we will explore using GPT-3.5 turbo APIs from Azure OpenAI, along with an open-source ChatBot UI and Azure Monitor, to create a ChatGPT-like platform with monitoring capabilities for external users.
Prerequisites:
- An Azure Subscription, with approved access request to Azure OpenAI service. Link request can be found here: https://aka.ms/oai/access
- Visual Studio Code
- Docker
Provisioning the Azure OpenAI Model
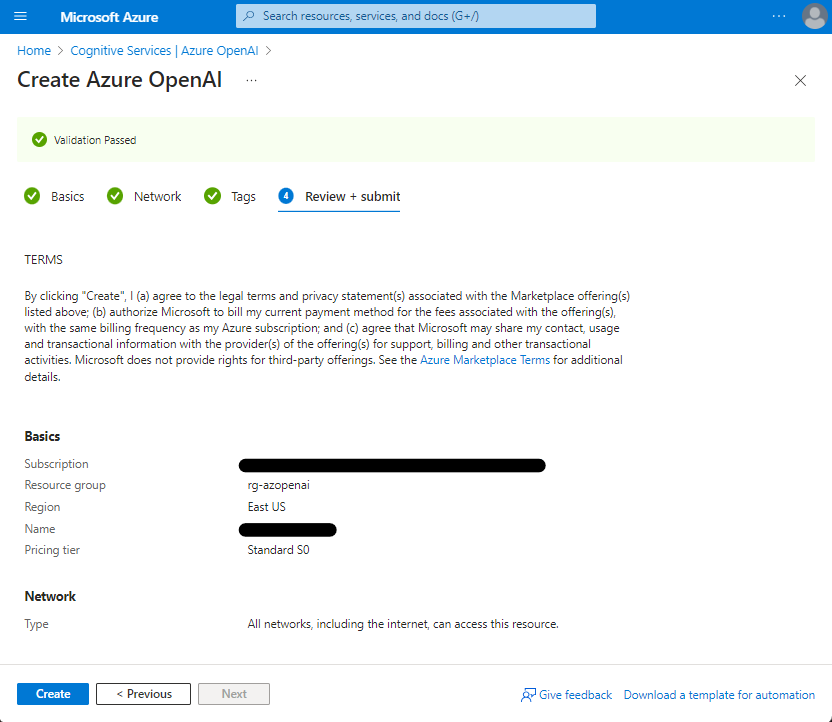
Start of by deploying an Azure OpenAI Service on Azure Portal, which can be found under Cognitive Services. With that, you can deploy your own models using Azure OpenAI Studio, such as GPT-4, DALL-E, Codex and more.
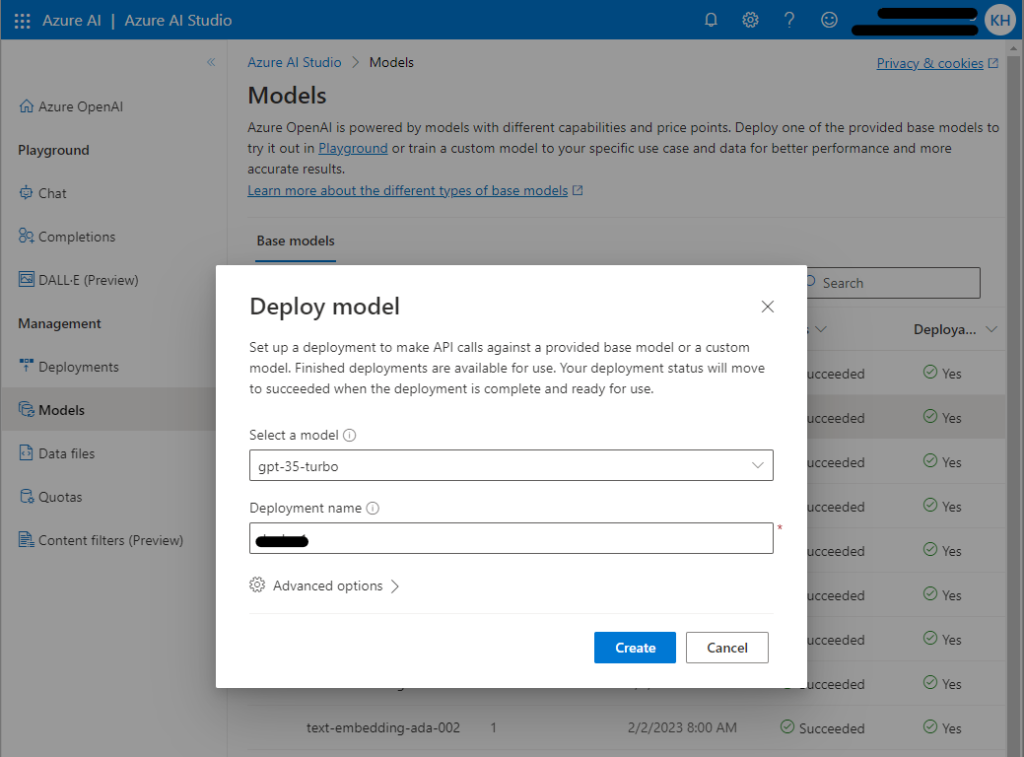
Once successfully provisioned, navigate to Azure AI Studio and deploy the gpt-35-turbo model. Take note of the Deployment name that you choose, as this will be needed later on.
Deploying ChatGPT UI to Azure Web App
Now on the next part, which involves cloning the chatbot UI GitHub repository in Visual Studio Code. This repository contains the necessary code and resources to set up the user interface for your ChatGPT model. By following this step, you’ll be able to provide a seamless and user-friendly experience for your chatbot users. Link to the open source ChatGPT UI can be found here : https://github.com/mckaywrigley/chatbot-ui
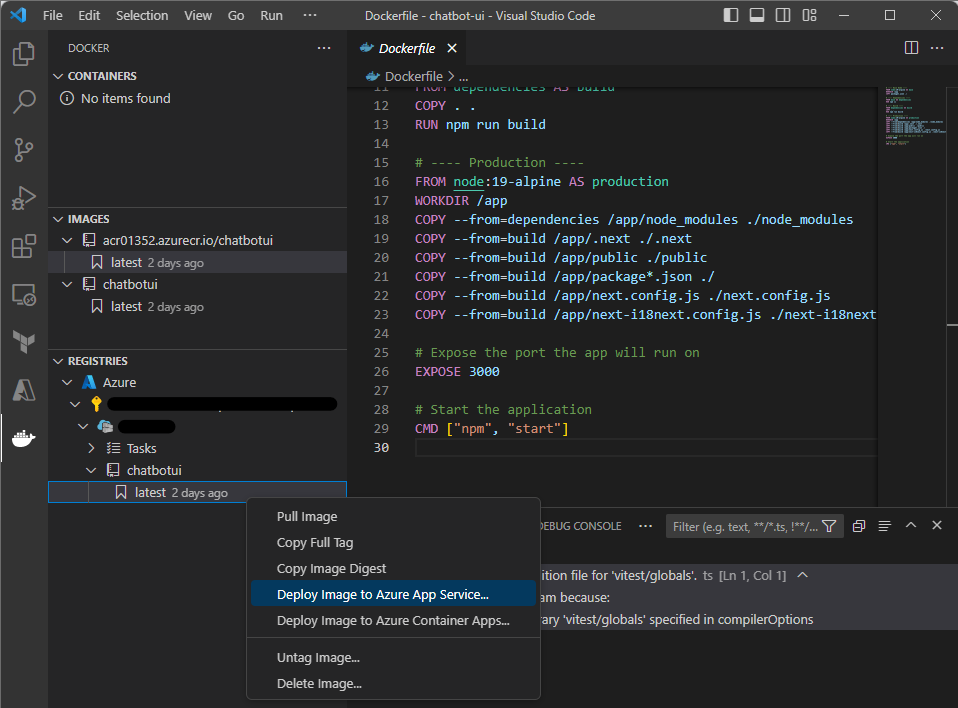
Using the Docker and Azure extension in Visual Studio, you can now build the docker image from the repository and directly push it to Azure Container Registry.

Next, Deploy the docker image to Azure App Service. You can choose the appropriate SKU for your needs. In my testing, I found that the B1 SKU worked well, offering a balanced combination of performance and cost-efficiency. However, feel free to use other SKUs based on your specific requirements.
To ensure that your chatbot functions seamlessly within the Azure environment, you need to include the necessary environment variables in the App Service. These variables serve as the link to the Azure OpenAI model that you have just provisioned. You can extract these information from Azure Portal, under the Azure OpenAI section where you will find the Keys and Endpoint. Add the variables below to your Azure Web App, under Application Settings.
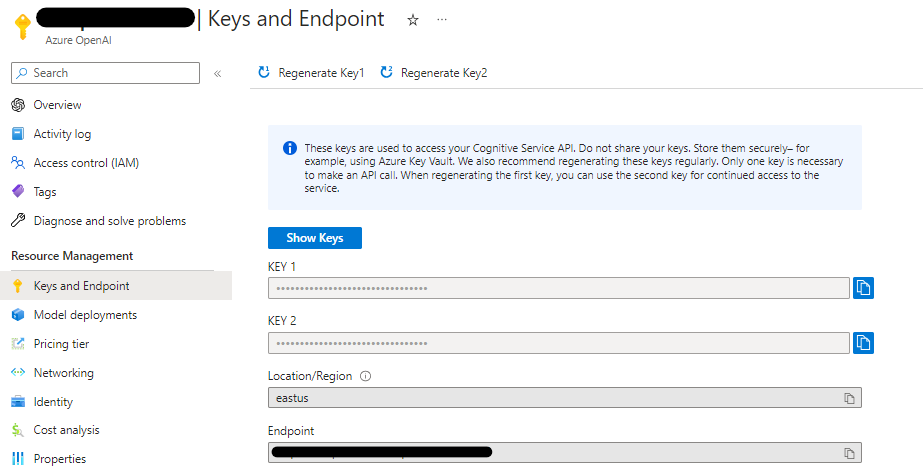
OPENAI_API_HOST = https://xxxxxx.openai.azure.com //Under Endpoint
OPENAI_API_KEY = xxxxxxxxxxxxxxxxxxxxxxxxxxxxxxx //Either Key 1 or Key 2
OPENAI_API_TYPE = azure
OPENAI_API_VERSION = 2023-03-15-preview
AZURE_DEPLOYMENT_ID = xxxxxx //deployment name of your model
DEFAULT_MODEL = gpt-35-turbo
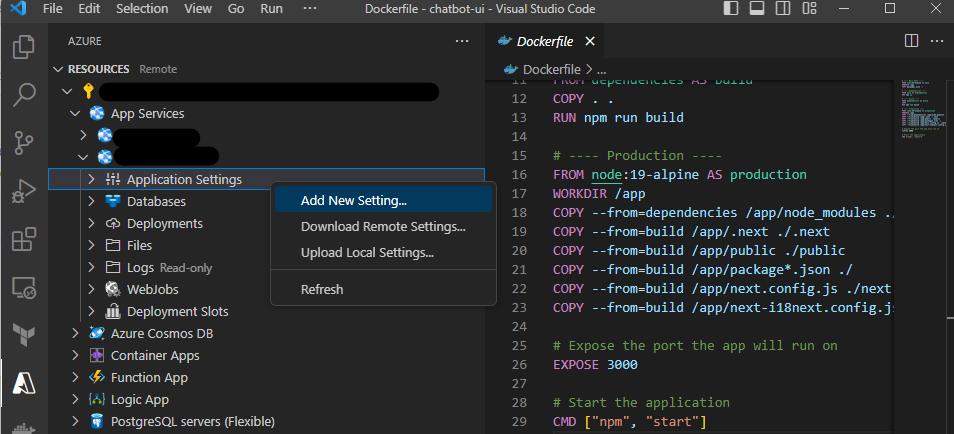
After saving these settings, restart the Web App and allow roughly 15 minutes for the updates to take effect. Once the necessary changes have been applied, simply navigate to the URL of your Web App and it should be ready to go!

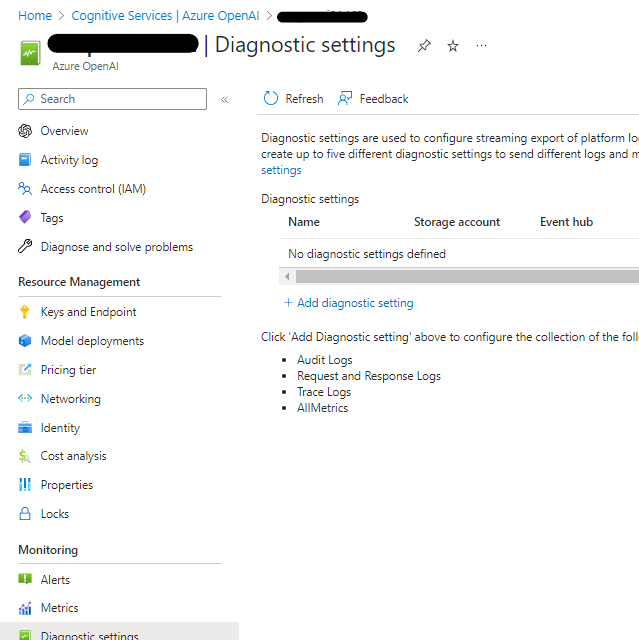
Configuring Azure Monitor for observability over model
Under the Monitoring tab, you’ll find the option to add diagnostic settings. This step allows you to define what types of data should be logged and monitored. By enabling the appropriate options, you can ensure that all relevant information, including request responses and model performance, is captured and ingested to the Log Analytics Workspace.
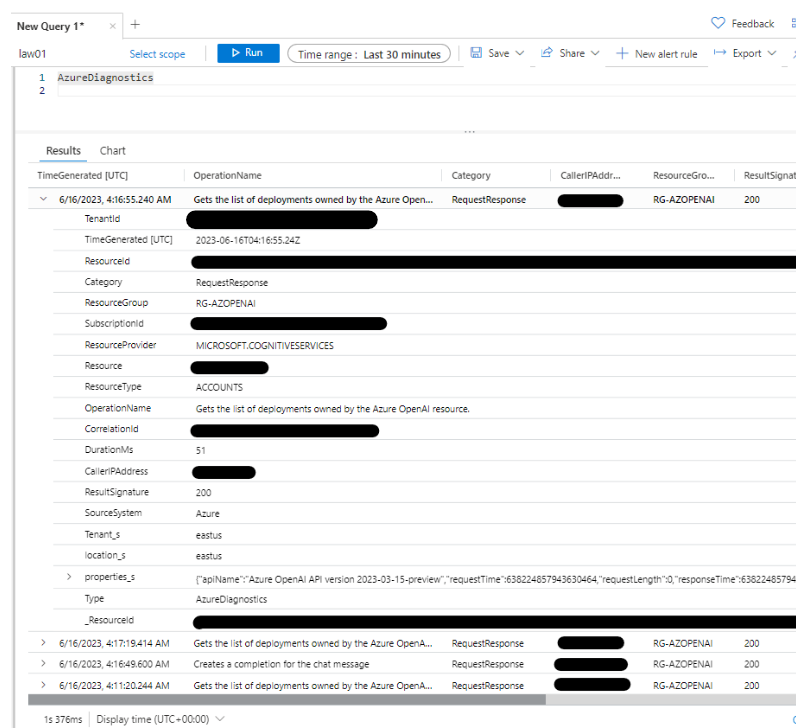
Through log querying, you gain a holistic view of the events associated with the requests made to your model and details such as Caller’s IP Address where you can identify and flag any unauthorized or suspicious access attempts. With these insights, you can significantly enhance your observability by setting up alerts and notifications via Azure Monitor.
And that’s it! What we have is a publicly accessible ChatGPT UI web app instance connected to your very own Azure OpenAI model, integrated to Azure Monitor for monitoring capabilities.
Publicly accessible platforms inherently pose security risks, as they are vulnerable to unauthorized usage and potential exploitation. By disabling public access and implementing private endpoints, organizations can exercise better control over who can access their ChatGPT-like platform. This can be achieved by configuring Azure App Service to allow access only from trusted sources or specific IP addresses, which we won’t be covering in todays post. Incorporating a robust user authentication system too, such as Active Directory enforces the overall security and integrity of the platform and should be included as an added customization. Thank you for reading!